It was the birthday of my younger daughter and I wanted to make it special. I rarely get birthday cakes from outside - for every birthday in my family, I make sure to bake a cake. The first time, I started this, was the 5th birthday for my younger daughter. But that was a steamed cake, made in pressure cooker. At that time, I did not have a microwave, so I found a ready-made cake mix, which can be made using a pressure cooker. The process was not at all proper baking, and how come you can call it a cake, which is not baked? So I was not satisfied!
From that day onward, for every birthday, I made the cake of my own. Many times, it was just a simple chocolate cake, as I did not have any idea of icing a cake during those days. But, still it made my daughters very happy. Many people asked me, why don't you get colorful iced cakes for your daughters! Yes, I could have went to a bakery shop and get the best cake from there; but to me, it was very much superficial. Baking a cake - is a project and it not only involves the basic ingredients, but also requires a lot of sincerity, dedication and passion. By baking the birthday cakes every year, I wanted to satisfy my desire of being more sincere and dedicated for my family-members. However, this is extremely personal view, and friends, no offence... please!!

I baked the chocolate sponge cake, a day before the birthday. Because, you have to give some time to cool the cake in room temperature. You also need the other ingredients ready by your side. One of the most important ingredients is fresh cream icing.

To prepare the fresh cream icing, I used -
BlueBird whipping powder - 2 packs
The whipping method is clearly mentioned at the back of the pack. Follow that carefully, to prepare a stiff peak whipping cream. Keep it inside refrigerator, until you are using it for icing.
Other than the whipping cream, you will also need whole de-seeded cherries. Tinned cherries will also do. My luck was not that good, I could manage some dried cherries from the dry fruit section of the grocery store. But that's fine, I took 1 cup of dried cherries and let them soak into 1/2 cup of warm water. Cherries became fresh and I got the cherry syrup, as well.
A black forest, is not a black forest, unless you use rum to soak the cake. But I did not have rum, instead I used 2 tablespoons of red wine, and it was quite good. I added that red wine to the cherry syrup.
Finally I had to prepare the melted chocolate for piping the mehendi design. I used the normal double-boiler method to melt 2 dark milk chocolates (medium sized). Once the chocolate started melting, I removed the glass bowl from the double boiler and kept it aside to cool down at room temperature.
Everything was ready, and it was the time to assemble.
Step 1:
Cut the cake horizontally in 2 parts. If you want, you can make 3 layers of cake, too.

Step 2:
Place one layer on top of a board, and soak with the cherry syrup. Add cream icing and spread nicely on top. Sprinkle cherries all over.

Step 3:
Cover the icing with the other half of the cake. Complete icing on top and sides. Place the iced cake inside the refrigerator for 30-60 minutes, before you start the chocolate design.

Step 4:
Use a piping bag to fill with melted chocolate. Make a small hole in the corner. Be careful, a little larger hole will make the design a mess. Also you will have better control over the chocolate flow, when you have a small hole. You can do your choice of design.
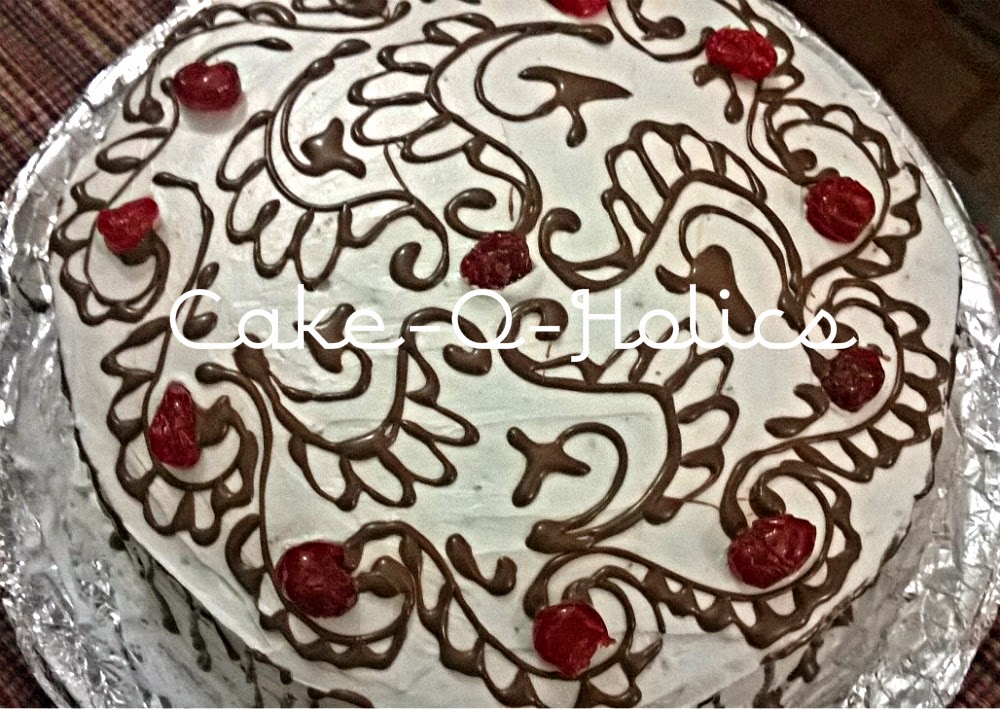
Here is a simple video of making the design on top of the cake. My younger daughter has recorded it in a mobile phone camera and then she has edited it. The editing software was a downloaded version, so the promo text is showing up in between. But this is her genuine effort to make me happy and so I am putting it in my blog.
I wanted to make her happy and she wanted to make me - it was a sincere emotion from both the sides. As a result, the cake came out so nice and the video, came out to be a surprise for all of us!

No comments:
Post a Comment