Showing posts with label fresh cream icing. Show all posts

Thursday, 21 May 2015

Fresh Strawberry Vanilla Cake

Hello friends!!!

Off late I am getting irregular with my posts and I am extremely sorry for that... Couple of family get-together and then my elder daughters results were out this Monday... so I was quite busy during this time. But that could not stop my weekend baking projects - I made few easier projects of cupcakes in last few weekends. Those will appear in my next posting - images are queuing up to be watermarked... so I am back with a bang, you can say!!


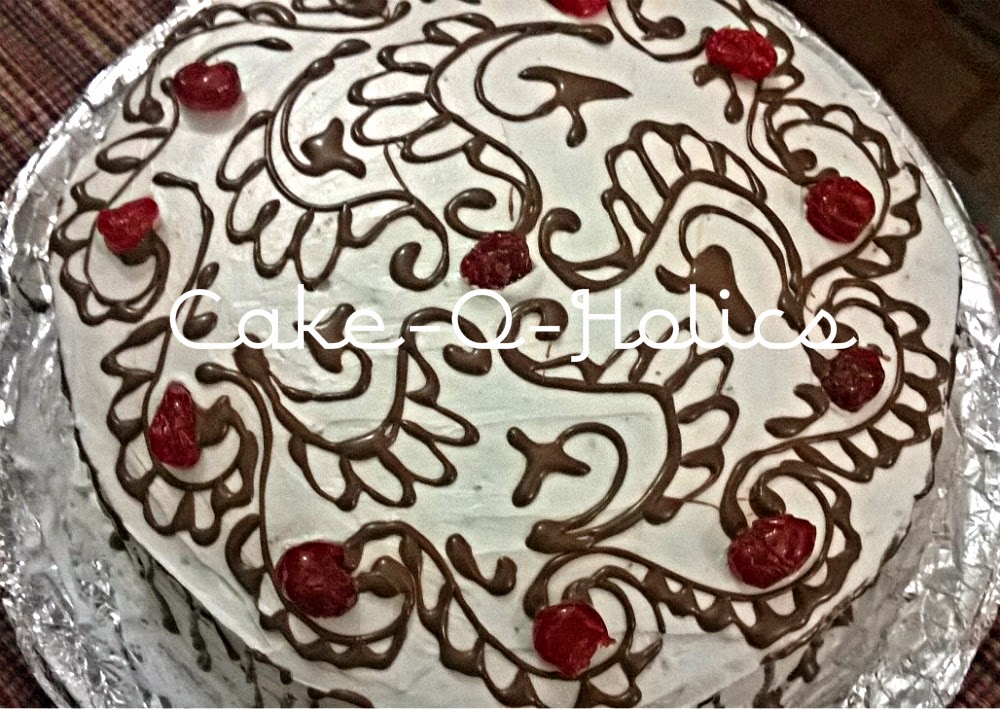
So let me pick up from where I was in my previous blog - A Vanilla Sponge Cake. I used a vanilla sponge cake to prepare this fresh strawberry cake. My baking guru - Lynette, shared few tips and after applying those tips it came out quite well. But, I won't say I was super successful in this project. After assembling the cake, I kept it in refrigerator for over-night and the next day I carried it to my brother-in-law's place, which is in 40-45 mins distance from my house. The car a/c was put on High and my hubby tried his best to give the cake a smooth ride - but still the cake got little soggy and the fresh cream icing was almost going to slide from the cake. The cake was immediately put into refrigerator. but it didn't come back to its previous shape. Here is a lesson learnt for me and for all of you - that don't carry a fresh cream cake for long distance, and even if you do, you should have proper logistics.

Here are the items you will need to prepare this cake -

Blueberry whipping powder - 2 packs
Fresh strawberries - 1 cup, vertically sliced
Strawberry crush - 1/2 cup
Light sugar syrup - 1/2 cup (add 2 tablespoon of sugar in 1 cup of water, boil and cool down at room temperature)

Step 1:
Slice the cake horizontally in 2 parts and evenly soak the bottom layer with some amount of sugar syrup. This will make the cake moist.

Step 2:
Spread 1/2 part of whipped cream on top of the bottom layer. Sprinkle 1-2 tablespoons of strawberry crush on top of the cream filling. You can also add few strawberry pieces into it.

Step 3:
Place the other half of the cake on top of the filling. Soak the top portion with remaining sugar syrup and then cover the top part with whipped icing.

Step 4:
Place the strawberry pieces on top of the icing in a nice way. If you want you can make designs with it too. Also add few pieces on the sides.

Step 5:
Put little amount of strawberry crush on top of the strawberry pieces to keep the strawberries fresh and moist.

Step 6:
After assembling, refrigerate the cake for over-night, so that everything is nicely set.


Friday, 3 April 2015

A Black Forest Cake and a Surprise!!!

It was the birthday of my younger daughter and I wanted to make it special. I rarely get birthday cakes from outside - for every birthday in my family, I make sure to bake a cake. The first time, I started this, was the 5th birthday for my younger daughter. But that was a steamed cake, made in pressure cooker. At that time, I did not have a microwave, so I found a ready-made cake mix, which can be made using a pressure cooker. The process was not at all proper baking, and how come you can call it a cake, which is not baked? So I was not satisfied!

From that day onward, for every birthday, I made the cake of my own. Many times, it was just a simple chocolate cake, as I did not have any idea of icing a cake during those days. But, still it made my daughters very happy. Many people asked me, why don't you get colorful iced cakes for your daughters! Yes, I could have went to a bakery shop and get the best cake from there; but to me, it was very much superficial. Baking a cake - is a project and it not only involves the basic ingredients, but also requires a lot of sincerity, dedication and passion. By baking the birthday cakes every year, I wanted to satisfy my desire of being more sincere and dedicated for my family-members. However, this is extremely personal view, and friends, no offence... please!!

This year, I planned to make a properly iced cake for her and I really made a plan much ahead of the day. Although it was a black forest cake, but I made it little bit unique, by drawing mehendi designs on top, using melted chocolate. In fact, the main reason behind this planning was that my daughter loves to wear mehendi on her hands. Her school does not permit to have mehendi-dyed hands, so many times, she does temporary mehendi drawings on her palms, using brown colored sketch pens. And I knew that she is going to love this cake, even before baking it!!

I baked the chocolate sponge cake, a day before the birthday. Because, you have to give some time to cool the cake in room temperature. You also need the other ingredients ready by your side. One of the most important ingredients is fresh cream icing. 

To prepare the fresh cream icing, I used -
BlueBird whipping powder - 2 packs

The whipping method is clearly mentioned at the back of the pack. Follow that carefully, to prepare a stiff peak whipping cream. Keep it inside refrigerator, until you are using it for icing. 

Other than the whipping cream, you will also need whole de-seeded cherries. Tinned cherries will also do. My luck was not that good, I could manage some dried cherries from the dry fruit section of the grocery store. But that's fine, I took 1 cup of dried cherries and let them soak into 1/2 cup of warm water. Cherries became fresh and I got the cherry syrup, as well. 

A black forest, is not a black forest, unless you use rum to soak the cake. But I did not have rum, instead I used 2 tablespoons of red wine, and it was quite good. I added that red wine to the cherry syrup.

Finally I had to prepare the melted chocolate for piping the mehendi design. I used the normal double-boiler method to melt 2 dark milk chocolates (medium sized). Once the chocolate started melting, I removed the glass bowl from the double boiler and kept it aside to cool down at room temperature.

Everything was ready, and it was the time to assemble. 

Step 1:
Cut the cake horizontally in 2 parts. If you want, you can make 3 layers of cake, too.


Step 2:
Place one layer on top of a board, and soak with the cherry syrup. Add cream icing and spread nicely on top. Sprinkle cherries all over.


Step 3:
Cover the icing with the other half of the cake. Complete icing on top and sides. Place the iced cake inside the refrigerator for 30-60 minutes, before you start the chocolate design.

Step 4:
Use a piping bag to fill with melted chocolate. Make a small hole in the corner. Be careful, a little larger hole will make the design a mess. Also you will have better control over the chocolate flow, when you have a small hole. You can do your choice of design.


Here is a simple video of making the design on top of the cake. My younger daughter has recorded it in a mobile phone camera and then she has edited it. The editing software was a downloaded version, so the promo text is showing up in between. But this is her genuine effort to make me happy and so I am putting it in my blog.


I wanted to make her happy and she wanted to make me - it was a sincere emotion from both the sides. As a result, the cake came out so nice and the video, came out to be a surprise for all of us!

Enjoy!!!

Friday, 20 March 2015

Fresh Cream Icing with Whipping Powder

Fresh cream icing was a challenge to me until I found this miracle product - BlueBird Whipping Cream Powder. Before that I tried with Amul fresh cream and also Amul whipping cream. There are other whipping cream products as well, which are just meant for cream icing. However, till now I didn't have the opportunity to use those products. As I mentioned earlier, that I am a self-taught baker and whatever I know about baking and icing today, I know it from few of my baker friends, baking channels on youtube and finally my experience.


Initially I tried with Amul fresh cream, as it is commonly available in any grocery store. However, this was not at all satisfactory. The maximum you could have is soft peak icing, but that's all. You can never make strong peaks using Amul fresh cream. Actually, this product is not meant for icing purpose also. 


The Amul whipping cream product is very good,though. This is particularly meant for whipping cream. Only once I found this product in my nearby departmental store. I bought a big tetra-pack of 500 ml and that stayed in my fridge for quite some time. I shifted the cream to a plastic container and stored inside the freezer. When in need, I used to bring this out in the lower racks of my fridge and then used to whip up the cream. It gave very good creamy consistency, but definitely you have to whip a lot.


However, the BlueBird whipping cream powder is a quick alternative for your any type of fresh whipped cream requirement. Just mix the powder with little amount of cold water, blend well and then whip for 10 mins. You will end up with a bowl of nice, fluffy, hard-peak icing cream. Keep it inside the refrigerator for 5 mins and then use for icing. You can easily bring a professional touch in your cake using this whipped cream product. For a 9" cake two packs of this powder is sufficient. You can make a layer in between and also can spread allover the body.


This one was the basic chocolate cake and I just covered it with BlueBird whipping cream... made simple designs on the edges to bring this simple but subtle look. How about a bite...!!!